Oh, Hi there!! I am so glad you stopped by to see what else I was able to create from this:

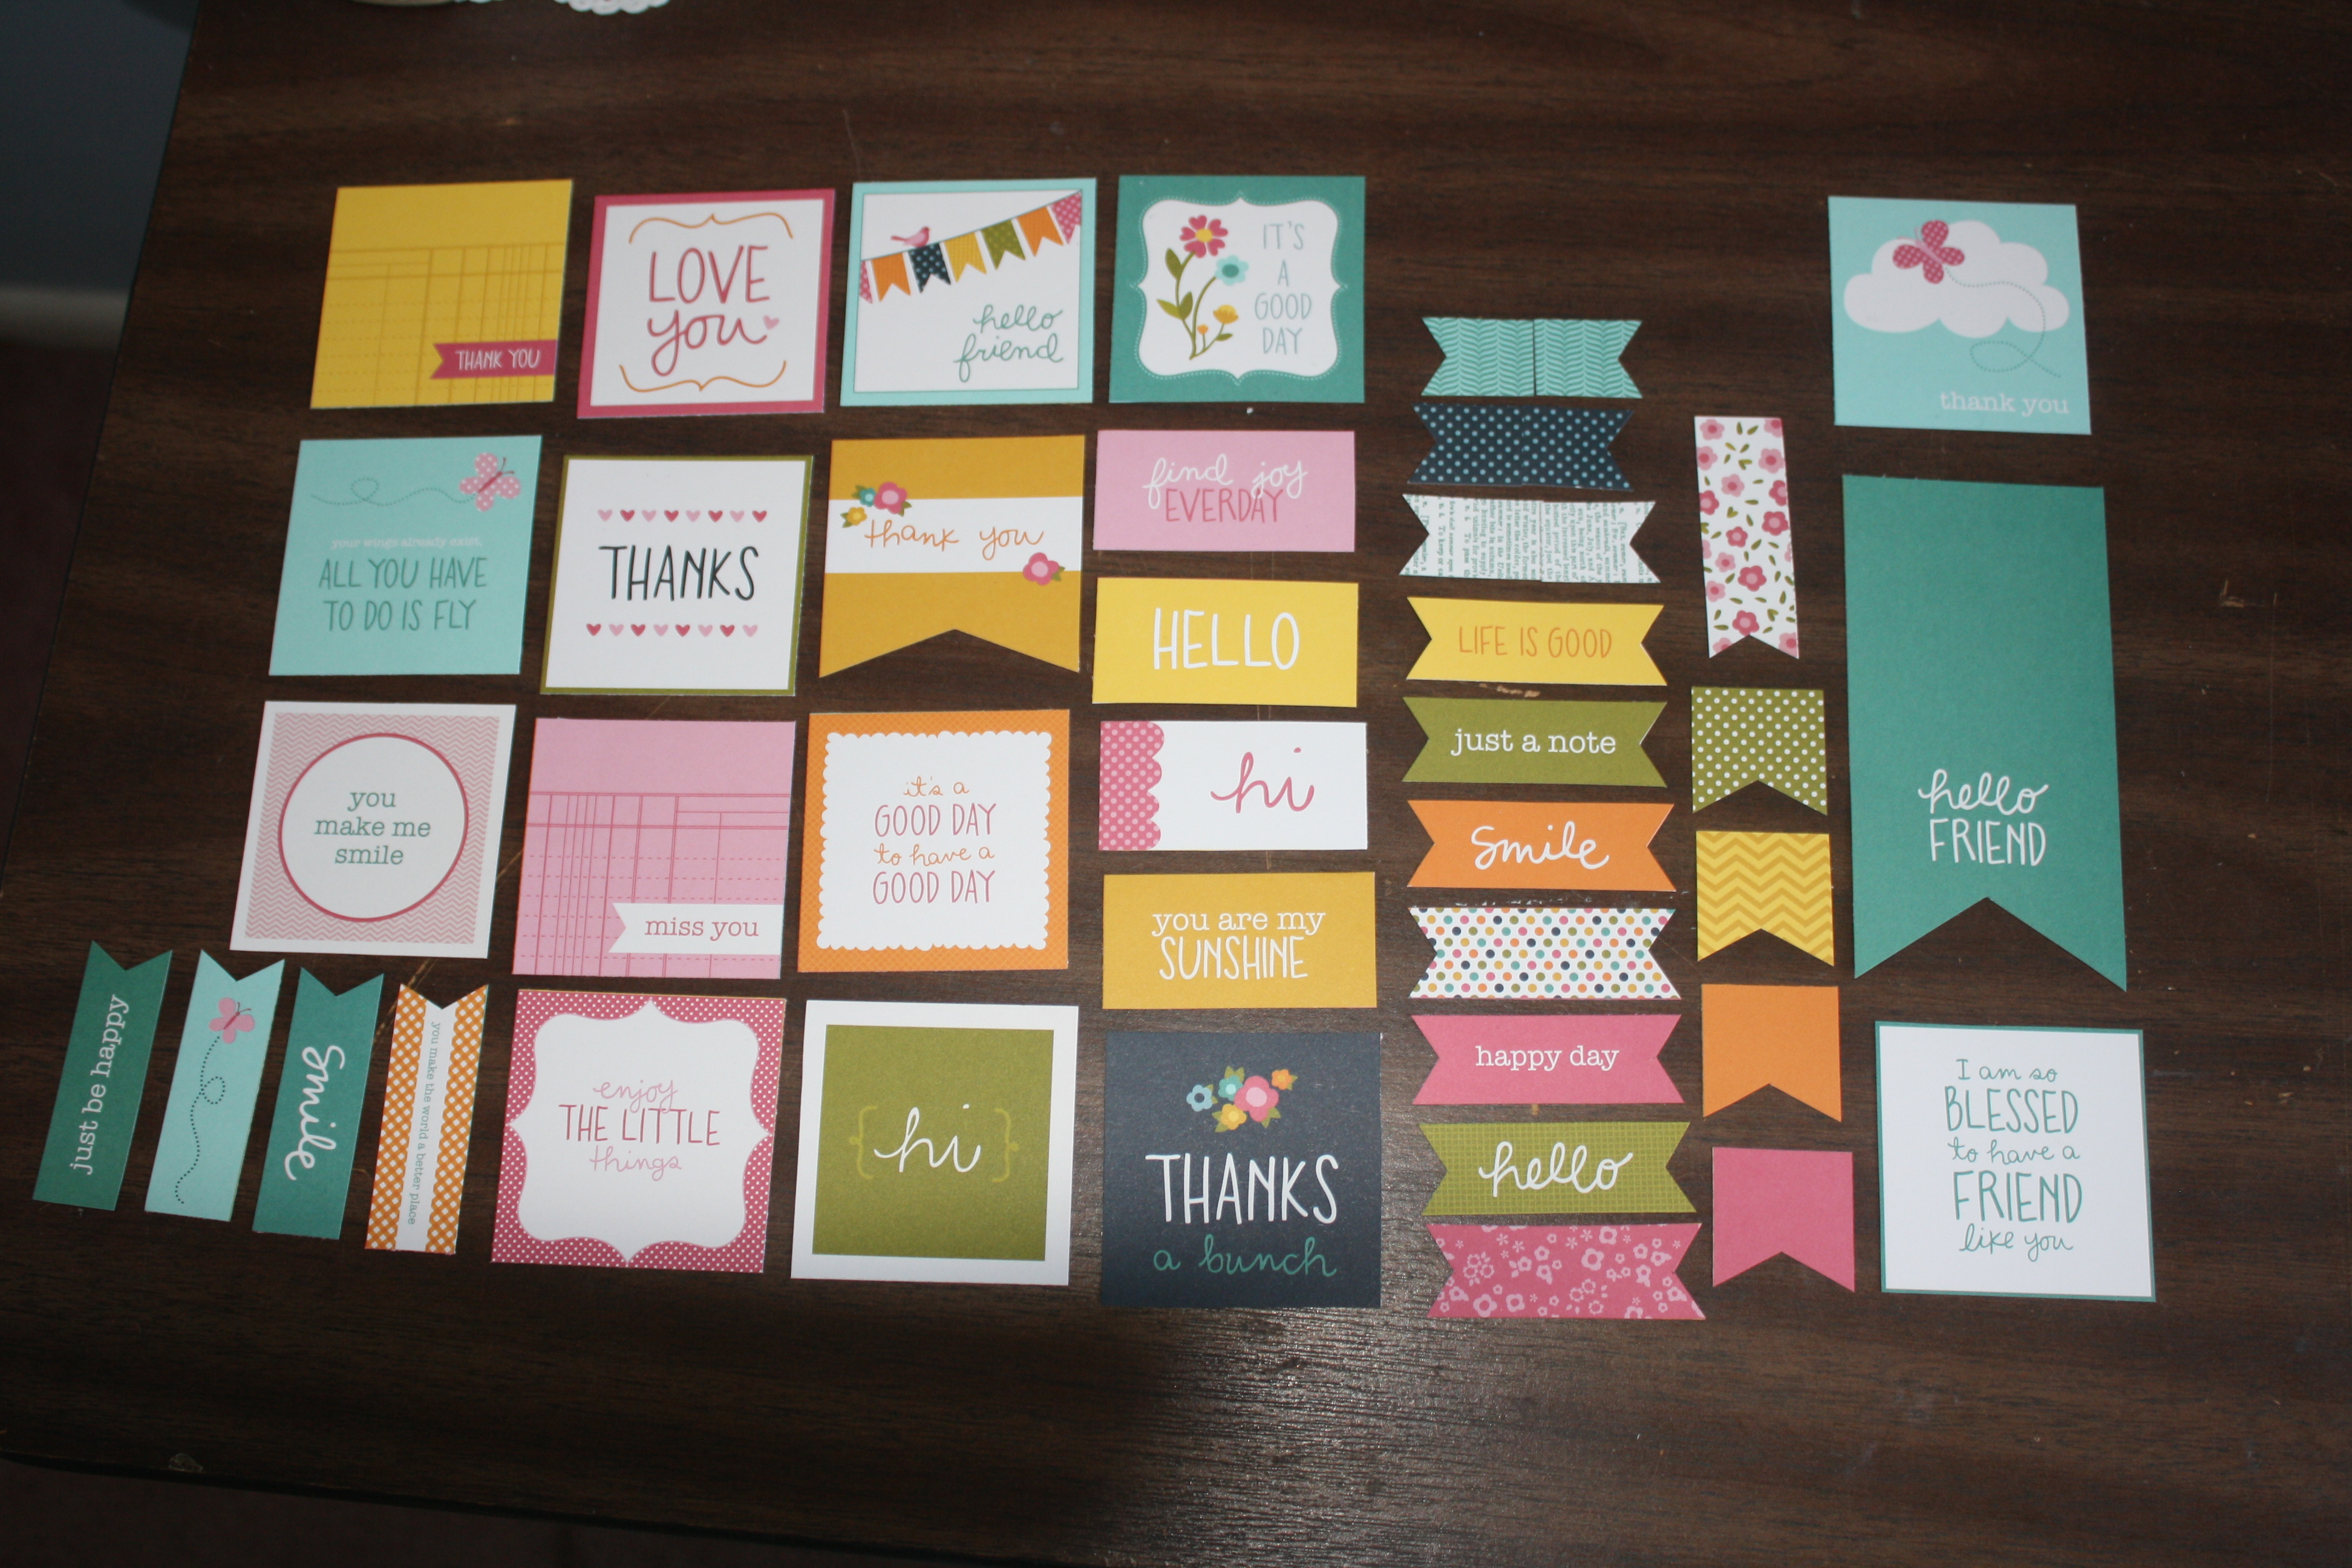
12 by 12 paper by Pebbles, Inc – From Me to You from Sunny Side Collection as it appeared before I cut it apart.
I have come up with 10 more projects from this paper and I will be showing them to you 5 at a time in this post and then one more post after that! I am so very excited with the response I had to my very first giveaway – the prize is all packaged and ready to deliver to the winner! I am going to offer another giveaway this week but I am going to shorten the comment time but more details on that at the end of this post. All right, now for the projects:
Take # 6 – Butterfly Thank you Chocolate Pouch

This notebook paper mini bag from Pebbles in My Pocket is the perfect size for a flat, square Ghirardelli chocolate. All it took to cute this up was the butterfly thank you square, a couple of Doodlebug brads, matching paper scraps from the Sunny Side paper collection and a mini clothespin – also purchased at Pebbles!
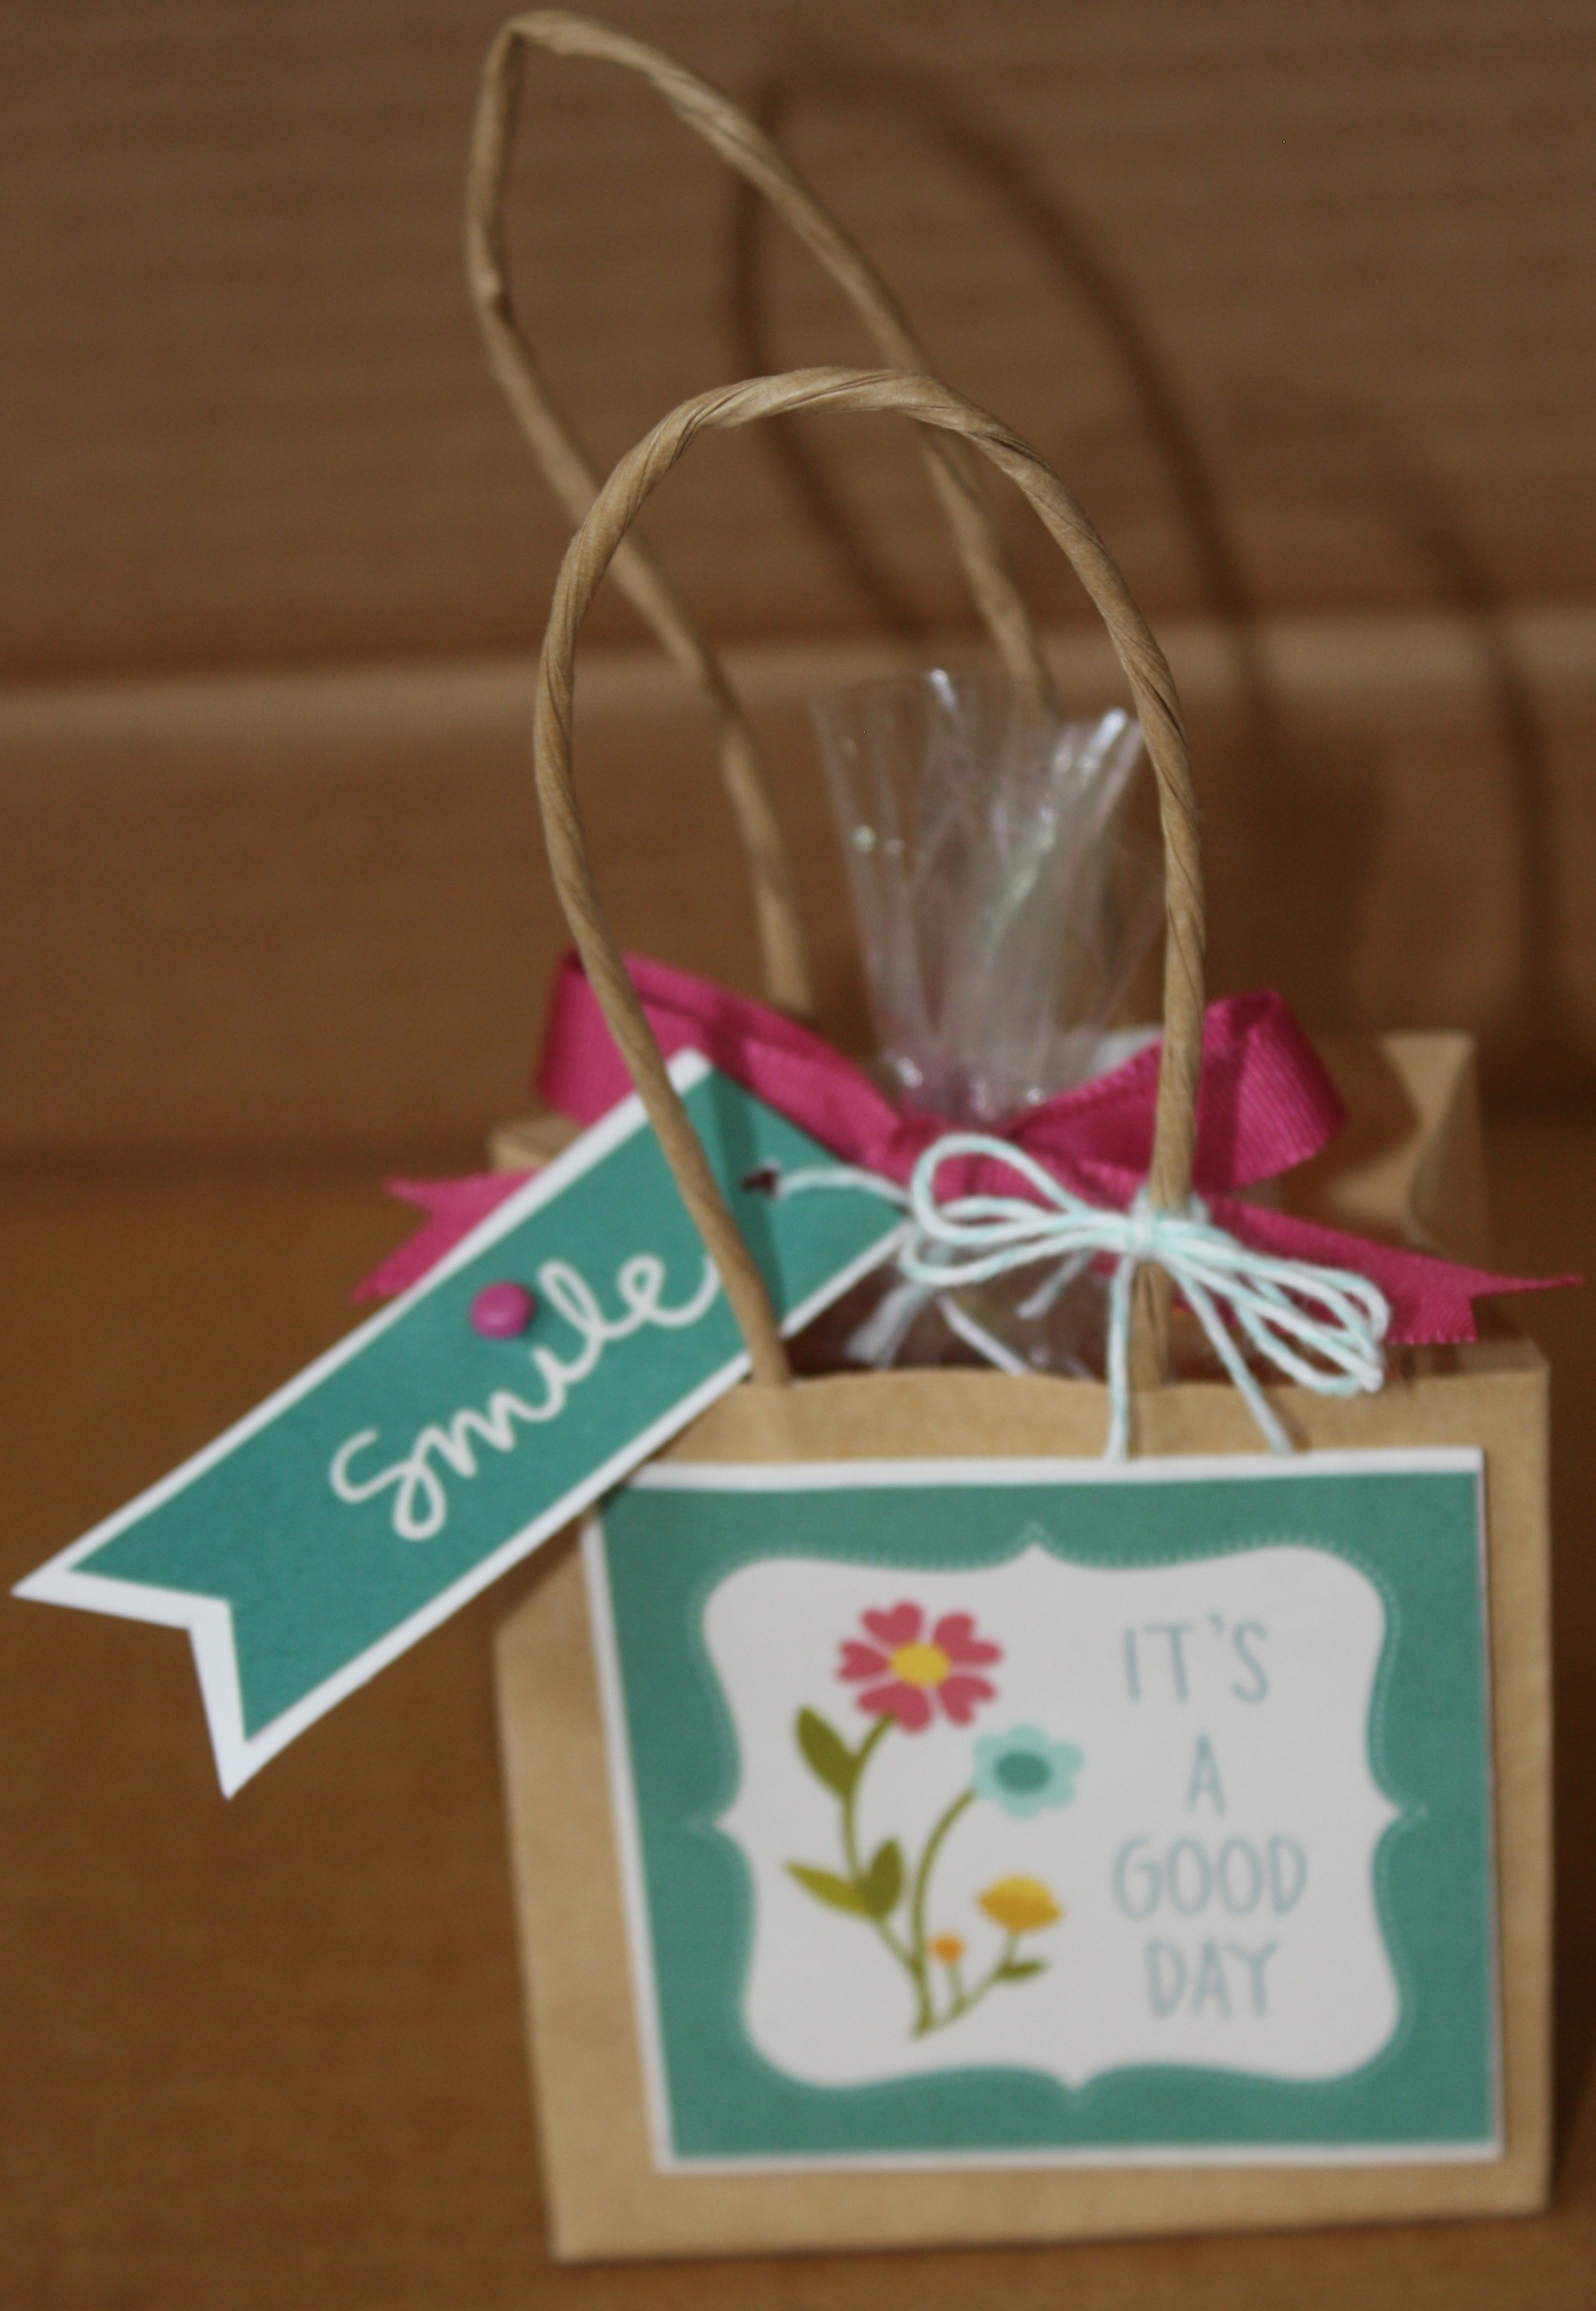
Take # 7 – “Smile, It’s a Good day” treat scoop

Here’s the “scoop” on this fun treat – I got matching colored sixlets from Zurchers and put them into a clear acrylic scoop that went inside a 3 by 5 cello bag. Using the “good day” square and the smile banner I “cuted” this treat right up! The back side of the square card features a pink background where I can write a note to let someone know that I hope they have a good day! The smile banner was taped to the handle of the scoop with double stick tape! The scoop itself was a great Dollar Store find!
Take # 8 – “hi, miss you” card
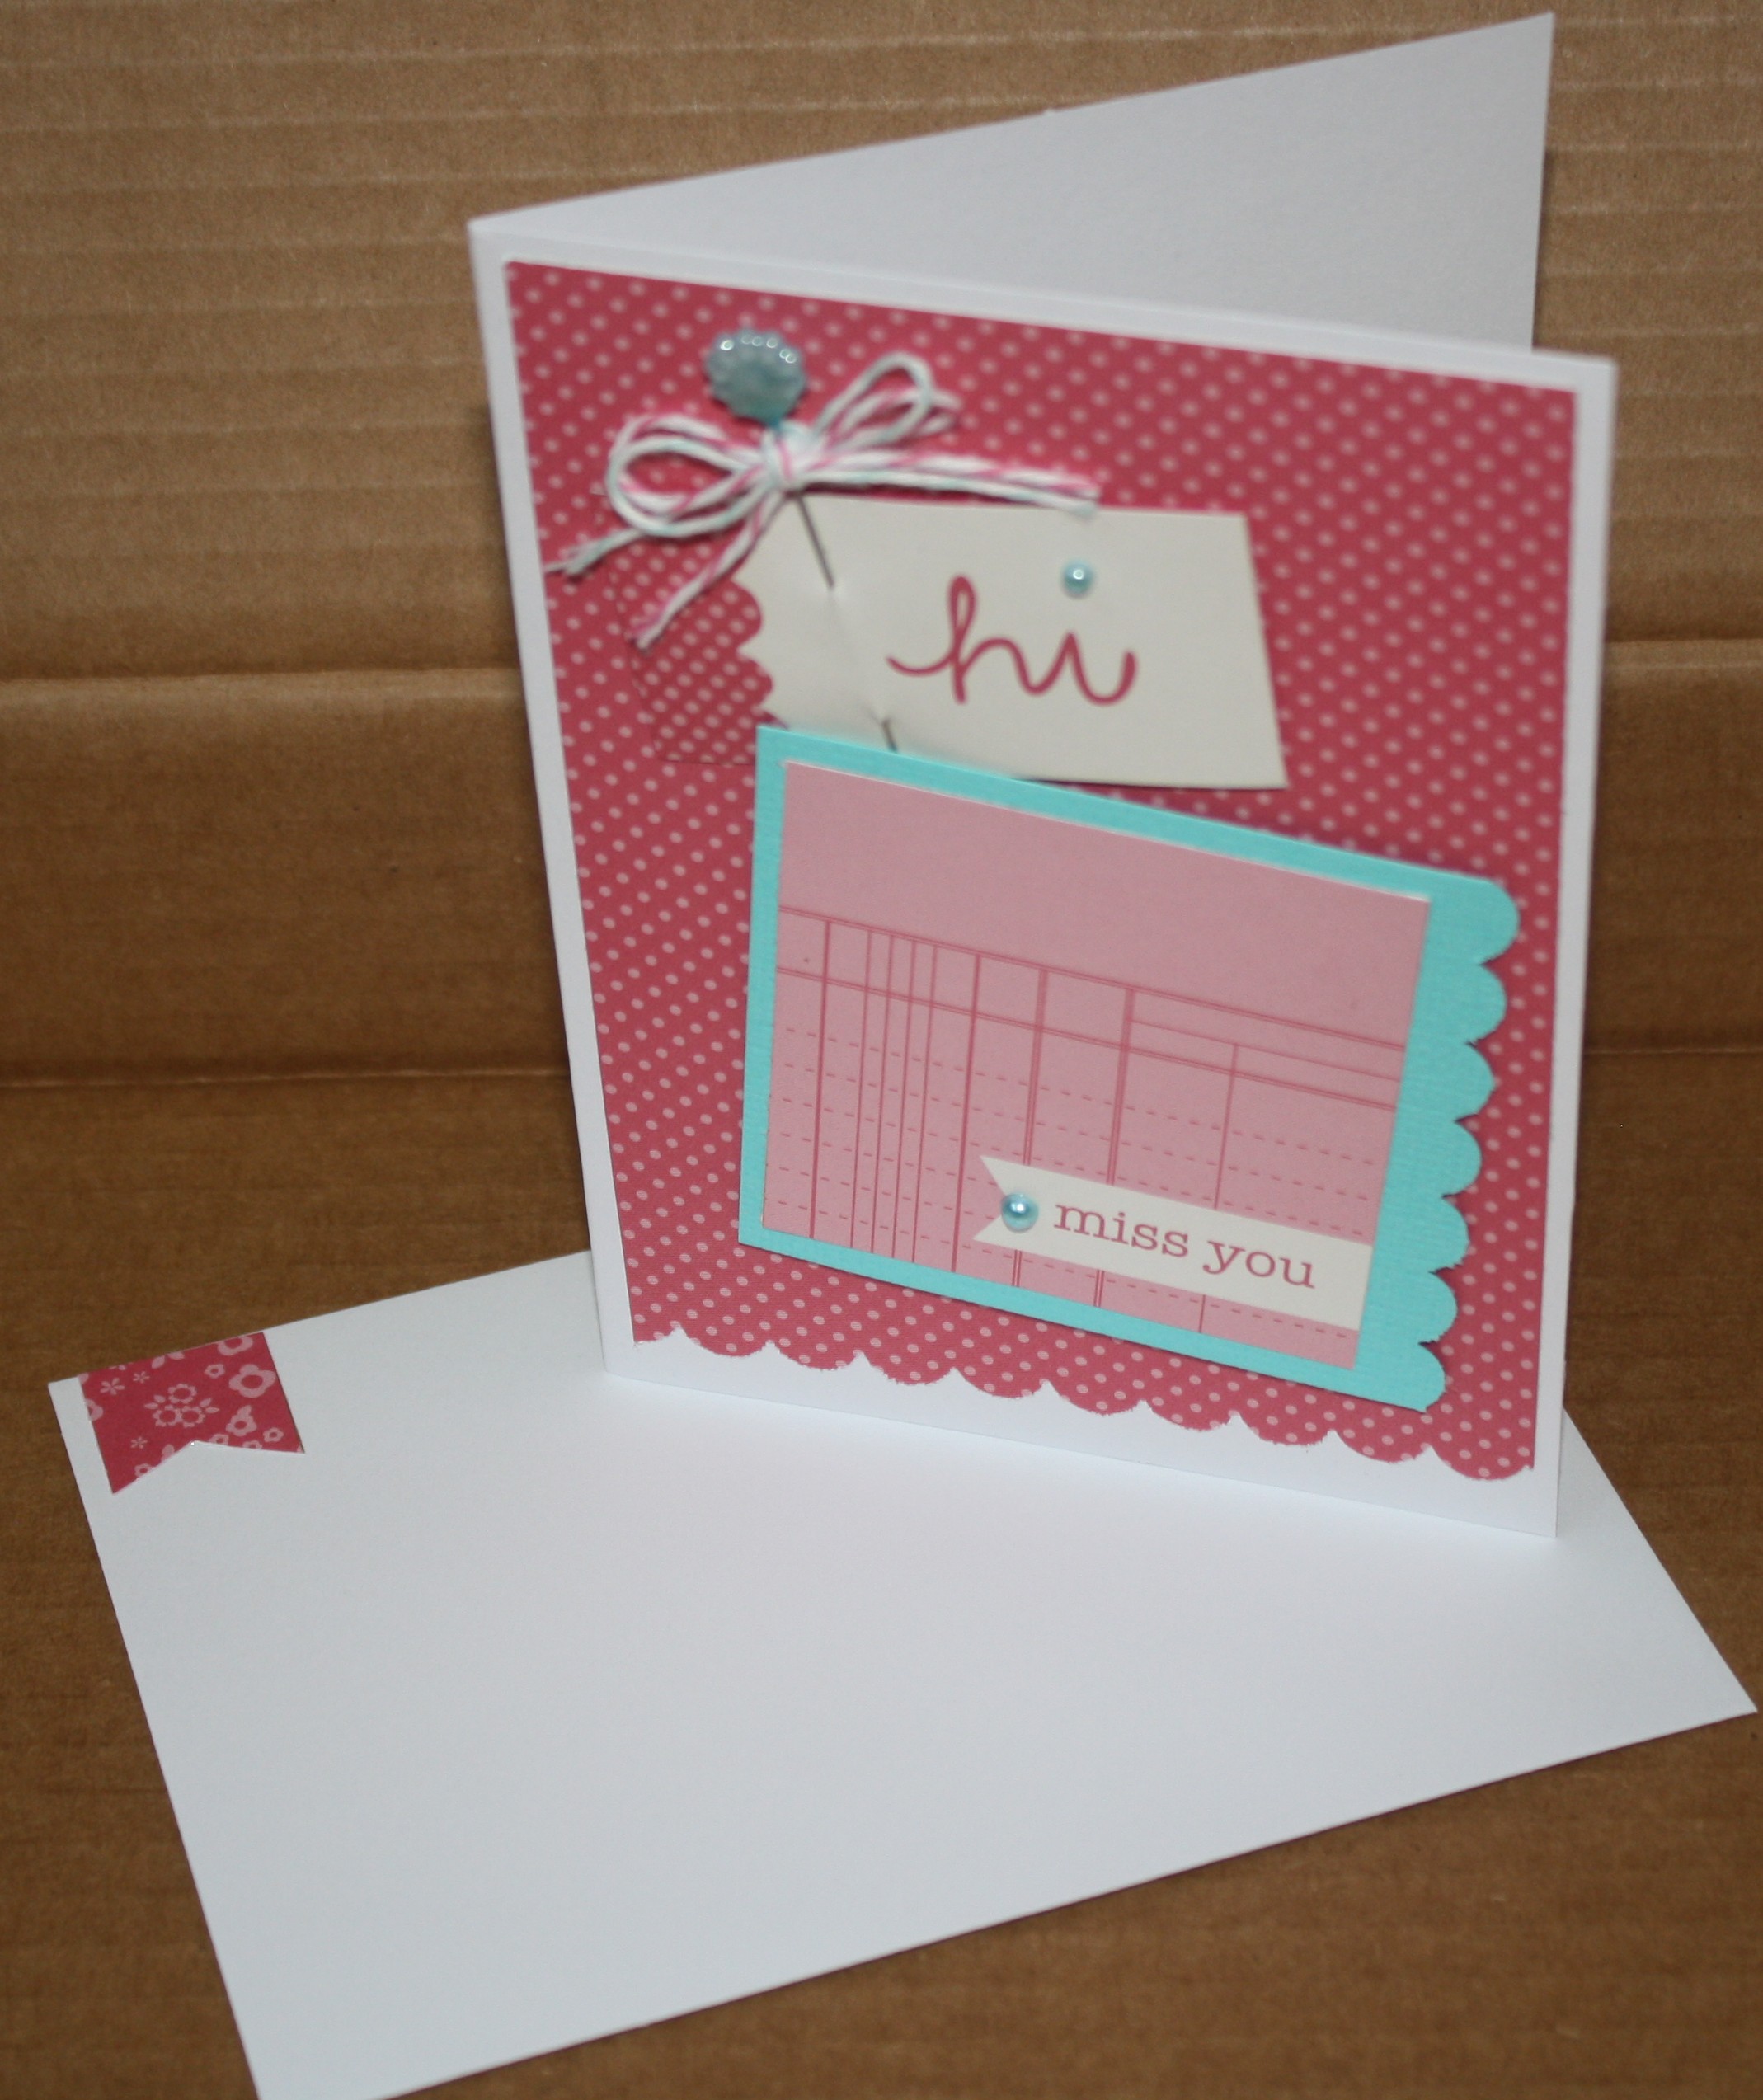
Oh this card, what fun it was to create! I used The Hi banner and the miss you square, my scallop edge punch and a stick pin from My Mind’s Eye and a couple of well placed Doodlebug pearls. The card itself came from a 50 pack of premade cards w/envelopes by Paper Studio from Hobby Lobby. The blue square is mounted on the card with mounting tape so that the sharp end of the stick pin would be absorbed by it.
Take # 9 – 4 Pennant Hello card

Using a premade Kraft card from a package I found at Hobby Lobby by Paper Studio this card was a cinch to make!! I took the 4 banner pieces that were the same size and sewed them onto the card with my sewing machine and then I added the green hello pennant! How cute and simple was that?!?
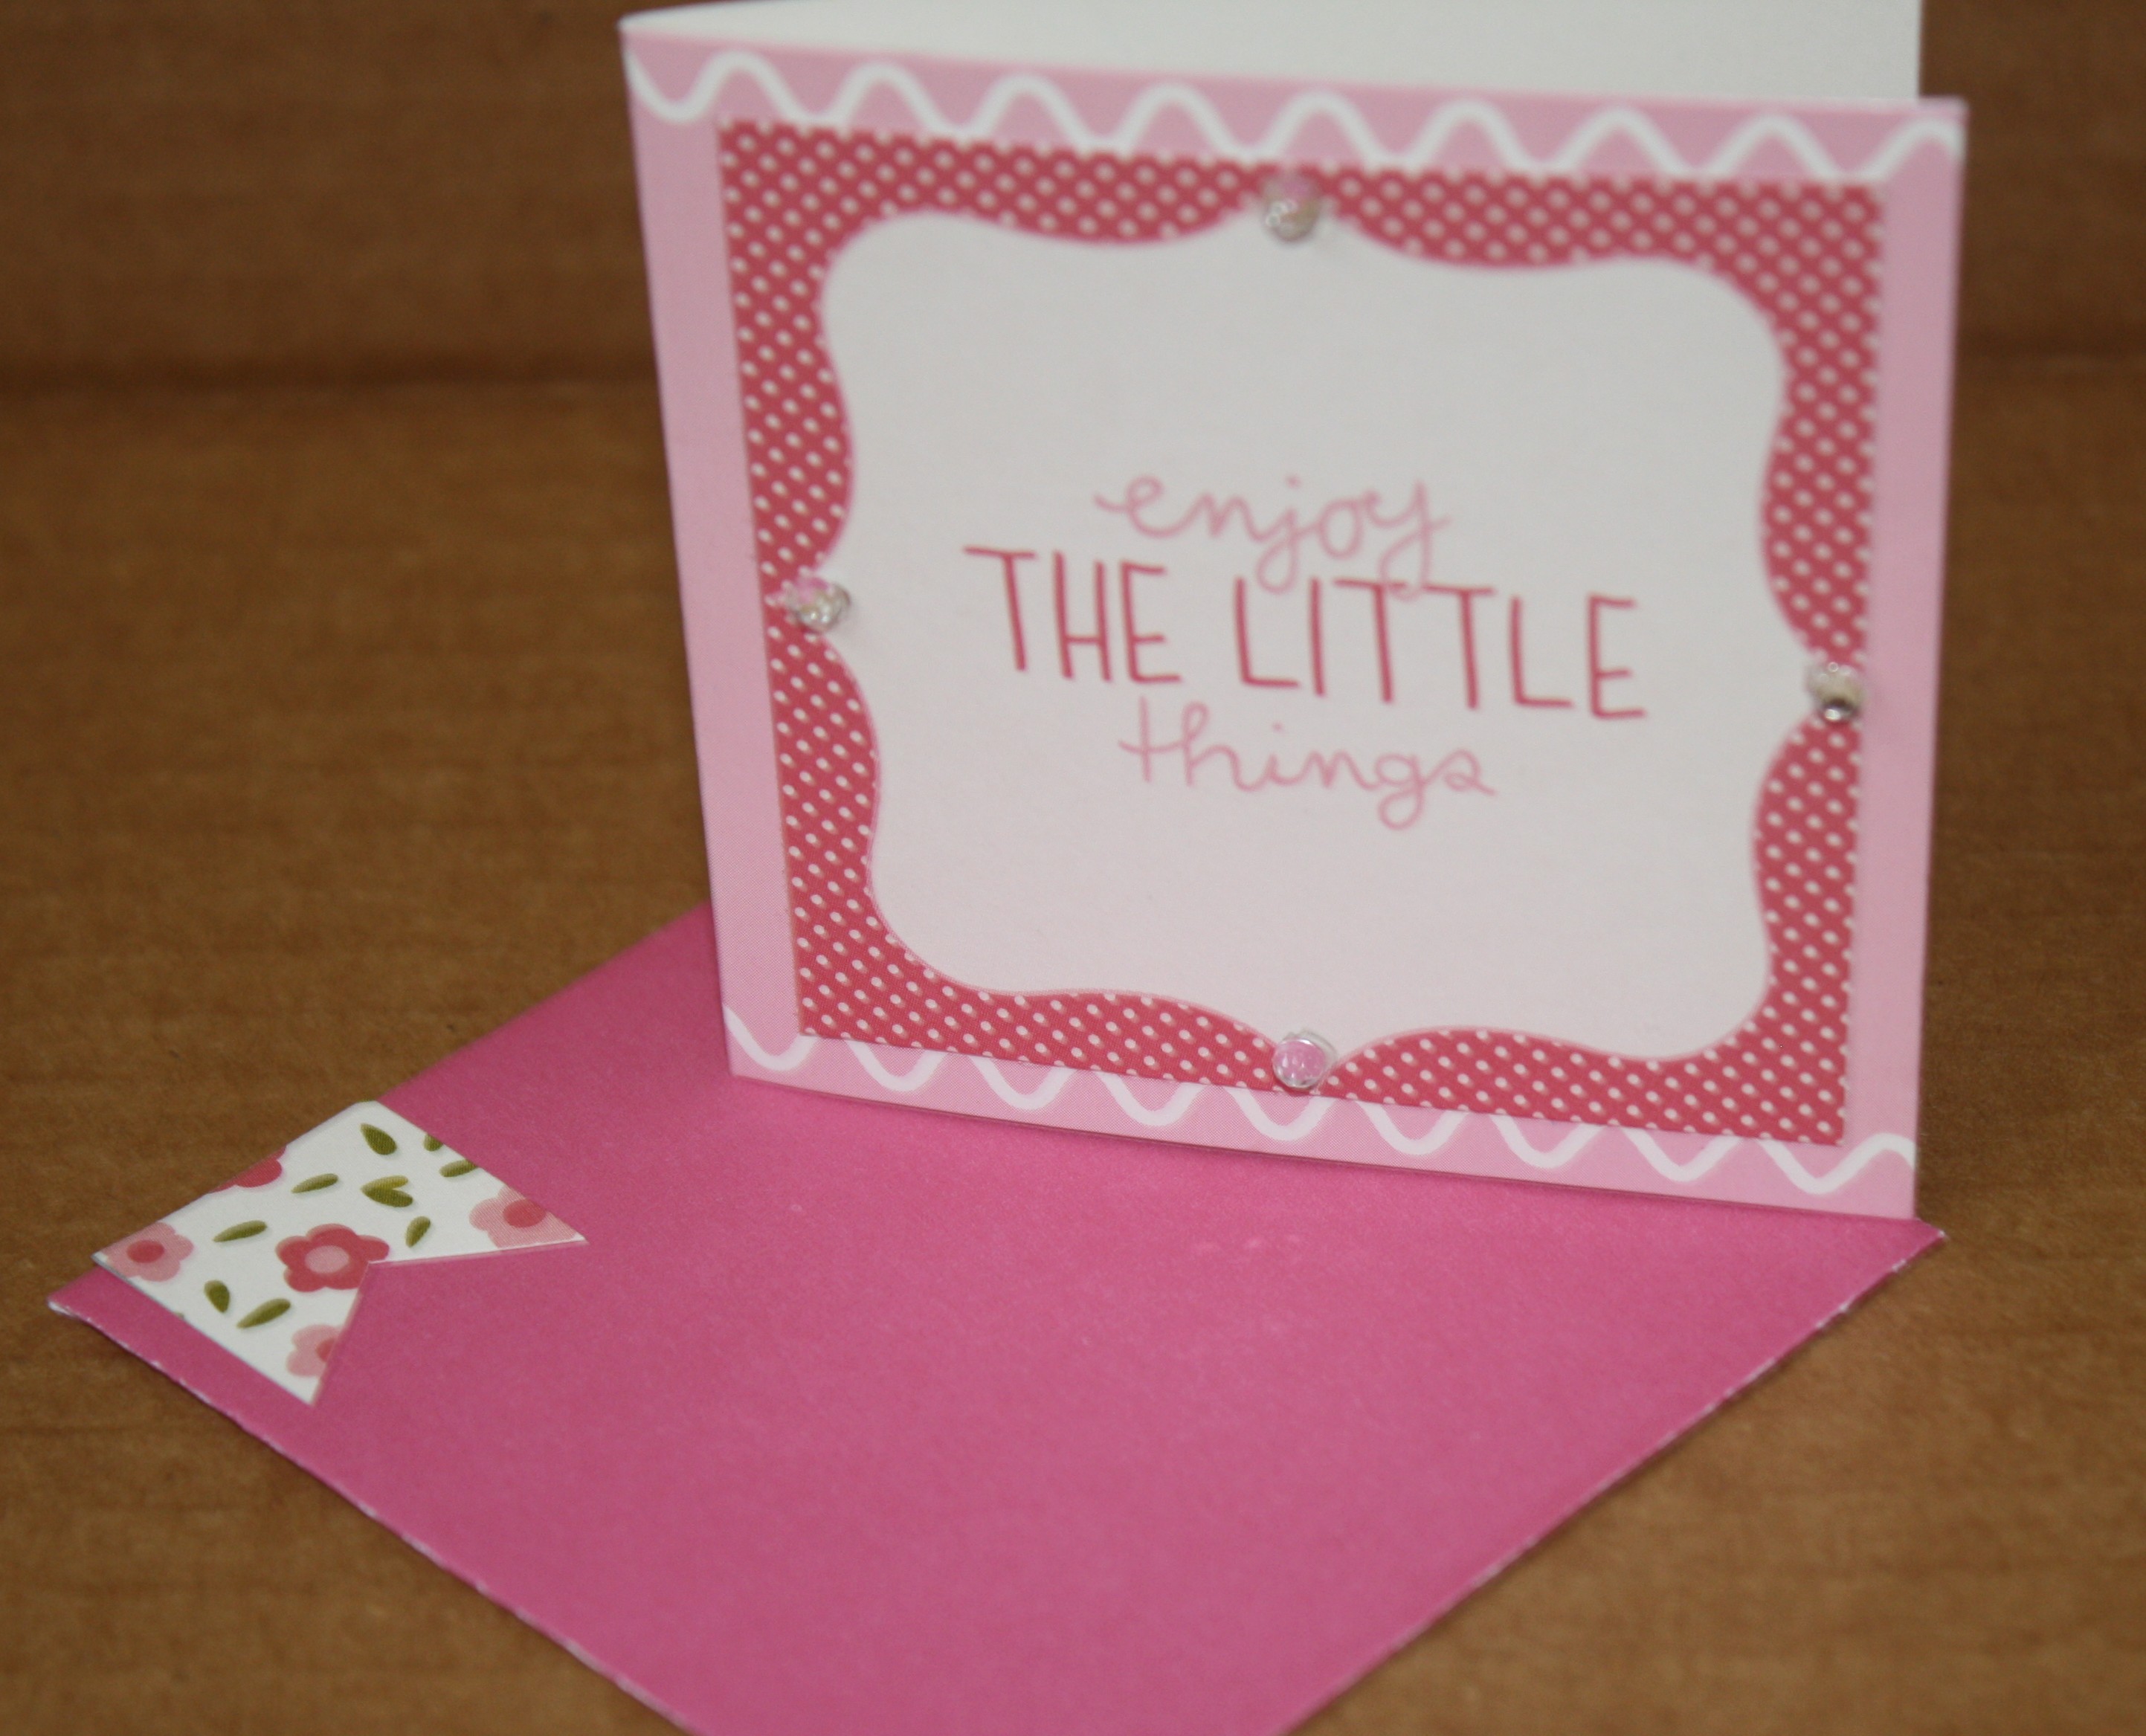
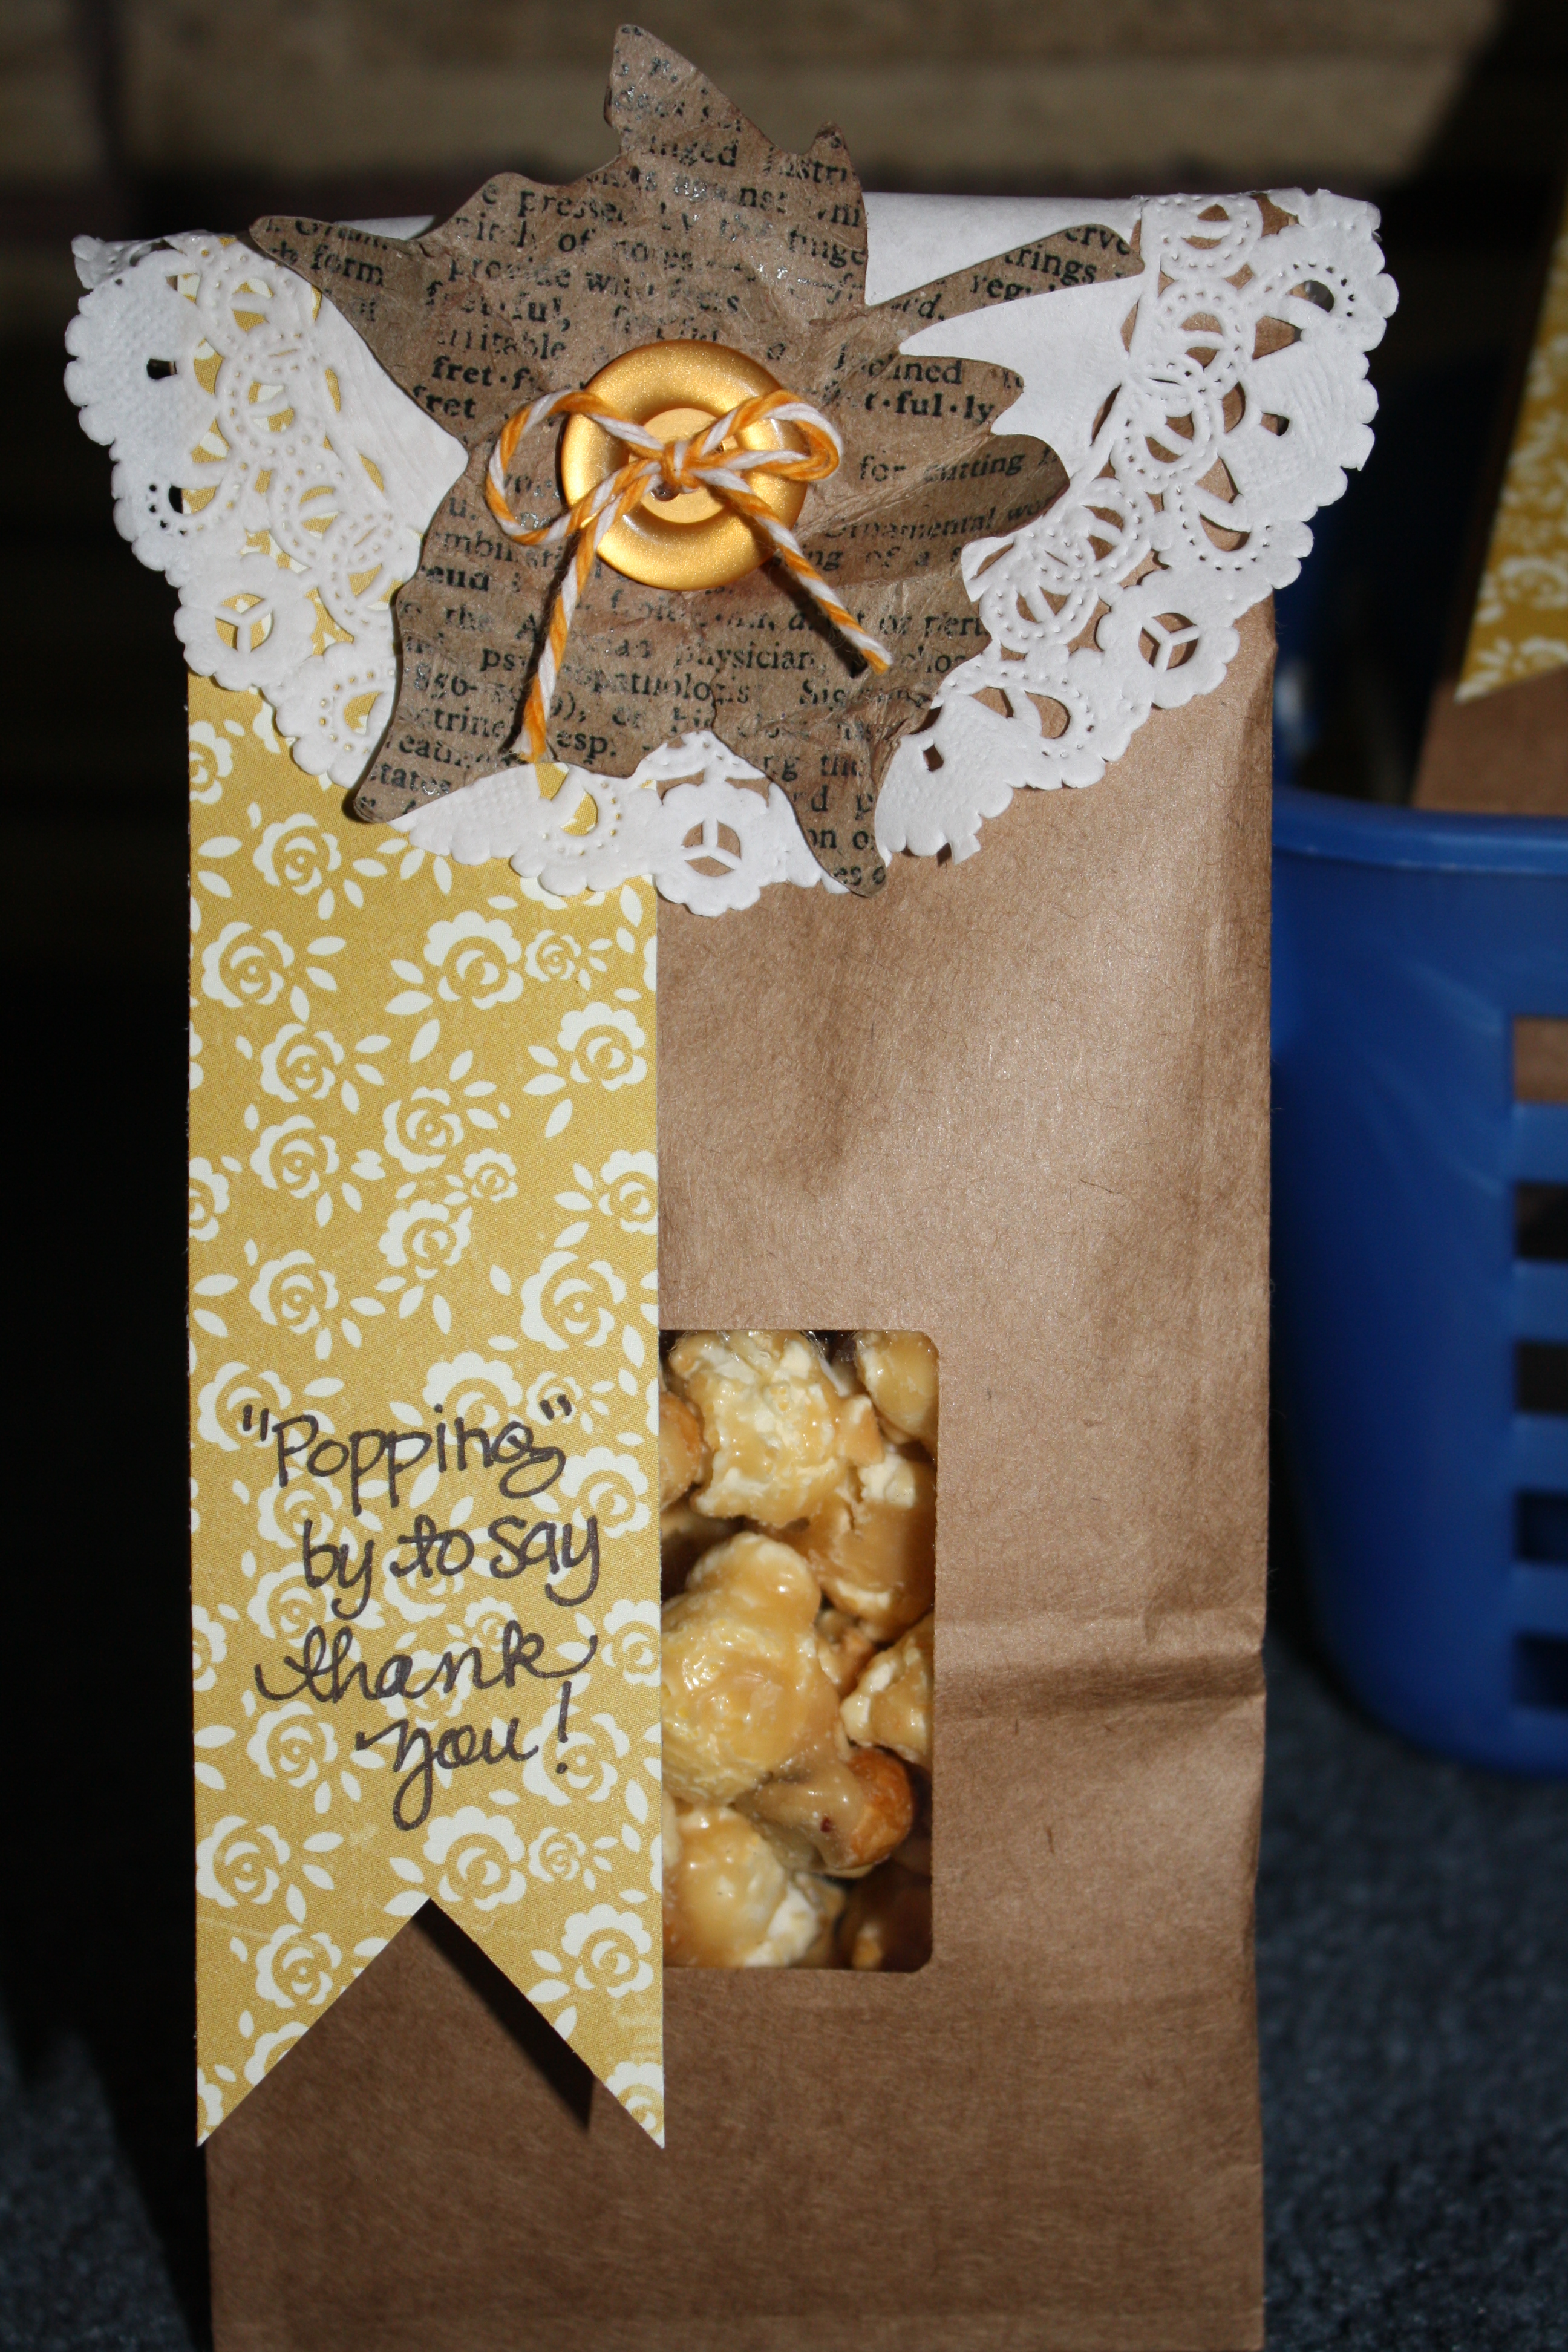
Take # 10 – “Thanks a Bunch” Kraft Treat sack

This simple flat kraft bag became a real beauty when I added a die cut bow, a Doodlebug brad, and a doily with the Thanks a bunch square. The bag could have any kind of treat placed in it but I have tried it out and found that 2 flat square Ghirardelli chocolates fit side by side just perfectly. I layered the square on the same Sunny Side paper that the bow was diecut from. I got the diecut and the doily from Pebbles in my Pocket!
Well, there you go – 5 more Takes using the From Me to You page of the Sunny Side Collection by Pebbles, Inc. Yes, I know each Take has added things to it besides just the paper piece but that is what I found so fun – using one, two or even a few pieces as a place to start creating! I hope this has inspired you and helped you realize that a handmade item can start with one cute thing and then be added upon to make it something completely creative and beautiful!! But the best part for me in making these is that now I have 5 things that I can use to shower love and care on loved ones! And you can too if you enter my giveaway!!
Giveaway Alert!!
Leave me some love and let me know what you think!!! I will be choosing a random commenter to win one of each of these projects that I made – Takes # 6 to 10. That lucky person will receive all 5 of the fun projects I made for this post!! Oh, And I will be adding a $10 Cold Stone Gift card in with the prize IF my comments # reaches 15!!! I will leave comments open until Wednesday, August 14th and then I will post the winner later that evening!!